


How to Create a Tier List for Anything: Step-by-Step Guide
18 Jul 2025
Official
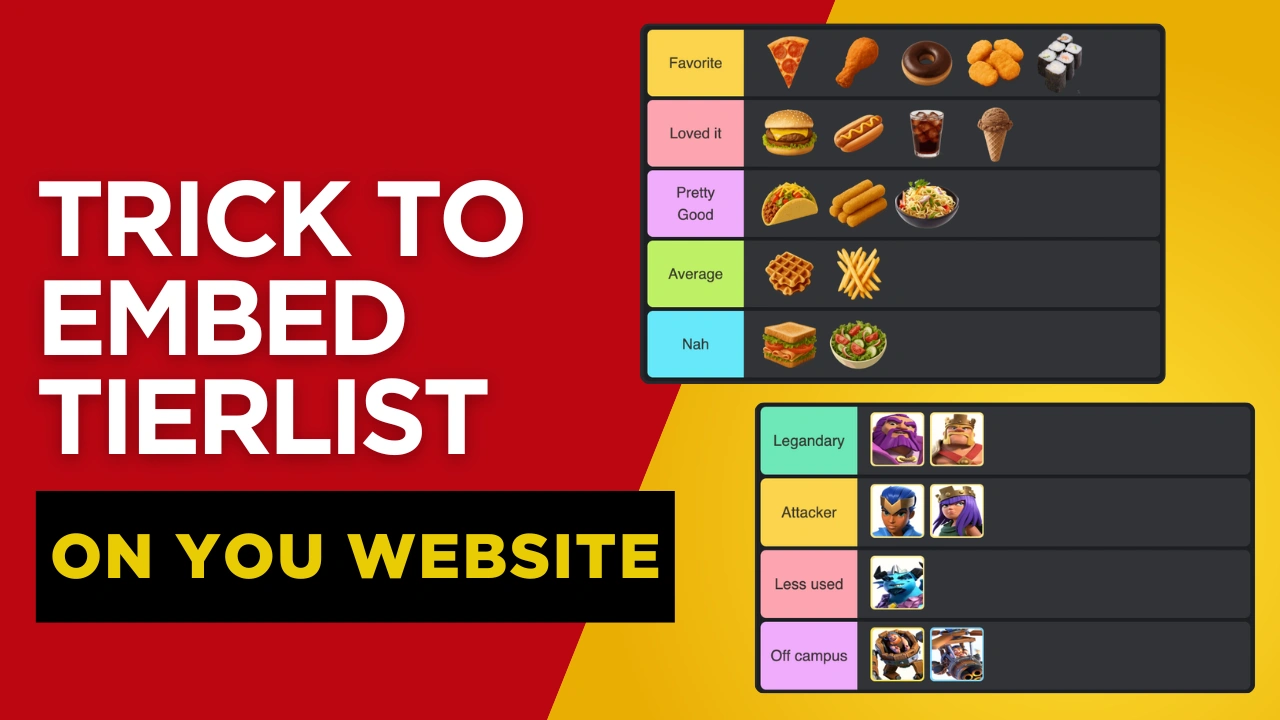
Whether you're ranking your favorite anime characters, fast food chains, gaming weapons, or even household chores — tier lists are a fun, engaging way to organize and share your opinions. In this comprehensive guide, we’ll walk you through how to create a tier list for anything using TierCards — the ultimate platform for building and publishing professional-looking tier lists.
Why Tier Lists?
- Easy to create and customize.
- Viral-friendly format for social media and forums.
- Ideal for content creators, gamers, bloggers, and educators.
- Allows visual comparison in a fun, digestible way.
Step 1: Choose a Blank Template or Pre-Made Tier List
Your journey starts with picking the right tier list structure.
Option 1: Create from Scratch
If you want a blank canvas and full control over your tier list, head over to:
https://tiercards.com/template
Option 2: Use a Pre-Made Template
Want to skip the basics and start with a ready-made format like "Best Fast Food Tier List"? Try this:
https://tiercards.com/template/fast-food-tier-list-mcx4o8wo5h71o
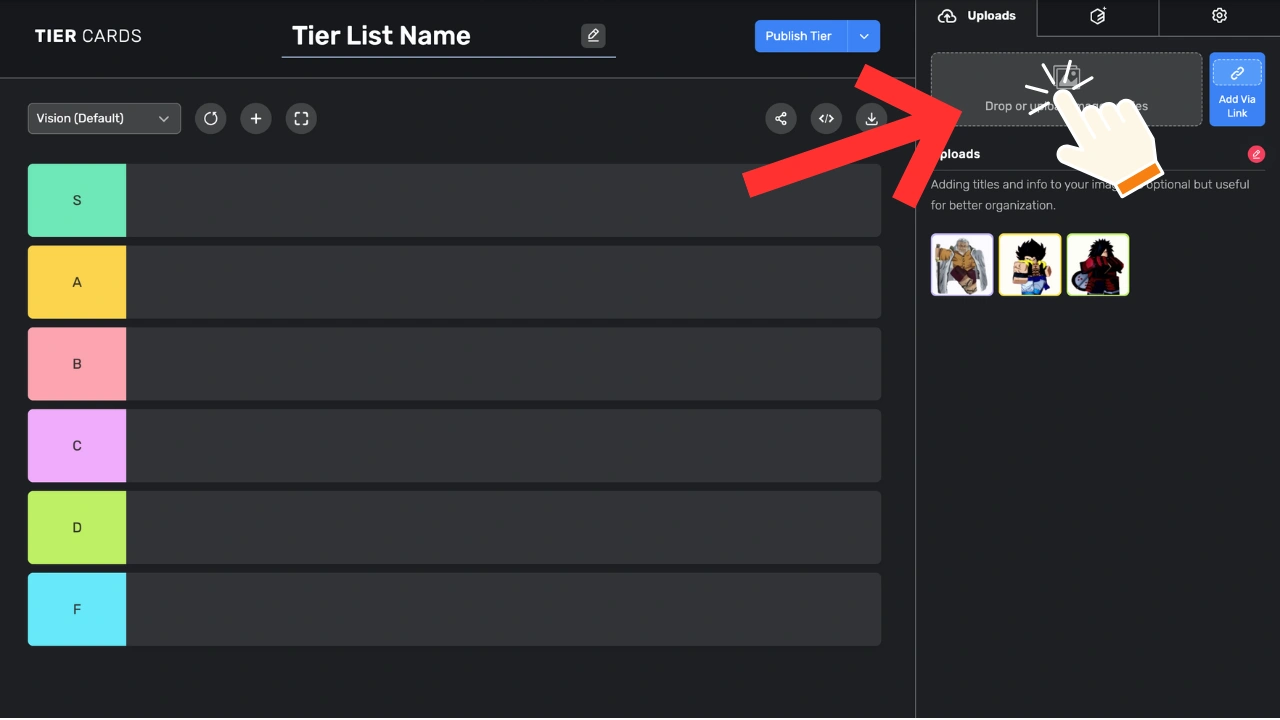
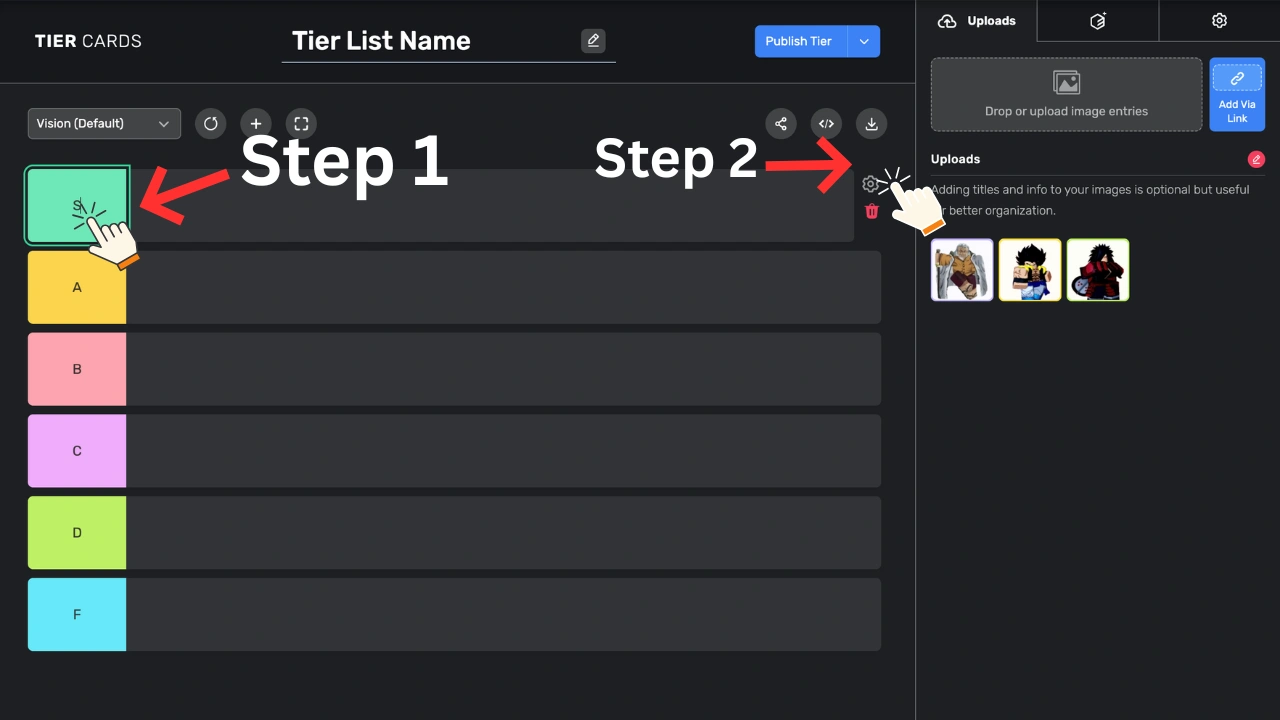
Step 2: Add or Upload Your Images
- Look to the left sidebar in the editor.
- Click on “Uploads”.
- Use the drag-and-drop box or click to manually upload images.
- All uploaded images will appear in the "Uploads" section.
Pro Tip: Use PNGs or square JPGs for better appearance.
Step 3: Edit Tier List Rows and Details
- Edit Tier Names: Click on any tier label to rename it.
- Insert New Tiers: Add a new tier row easily.
- Delete a Tier: Click on the left head of a tier row, then the delete icon will appear.
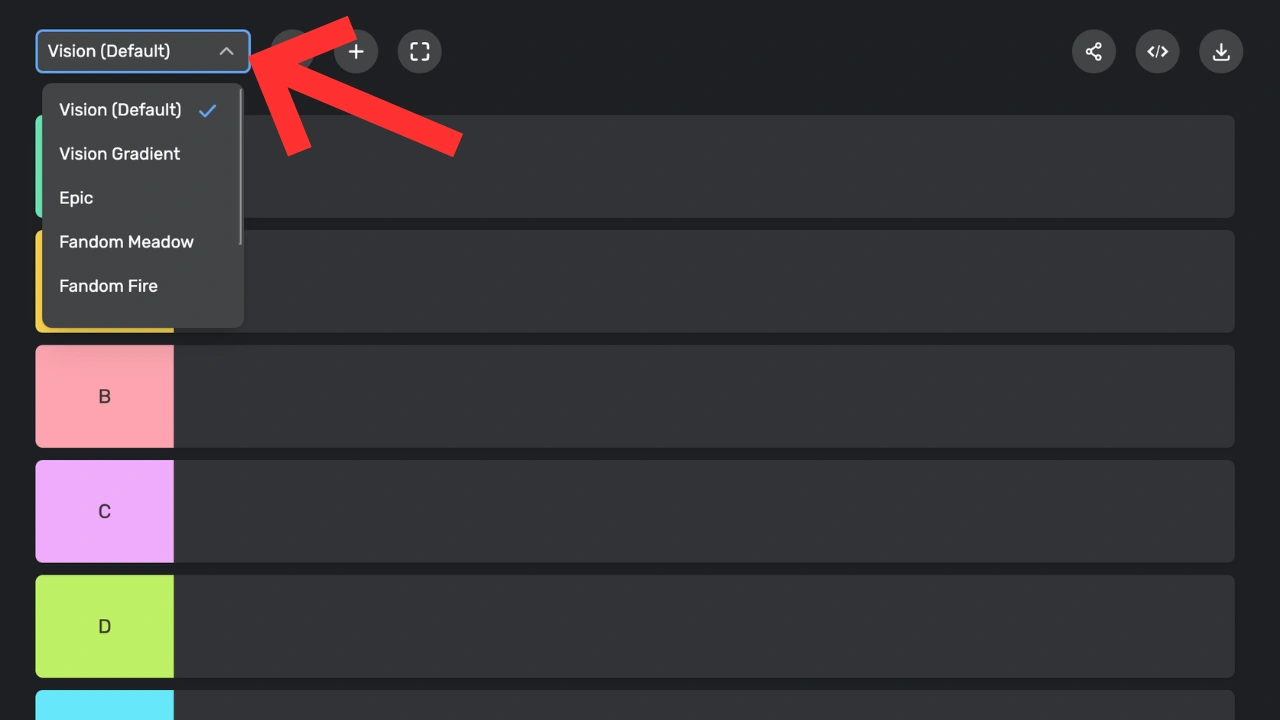
- Customize Appearance:
- Change background color of tiers.
- Modify the tier list title and its color.
- Reorder rows and layout styles.

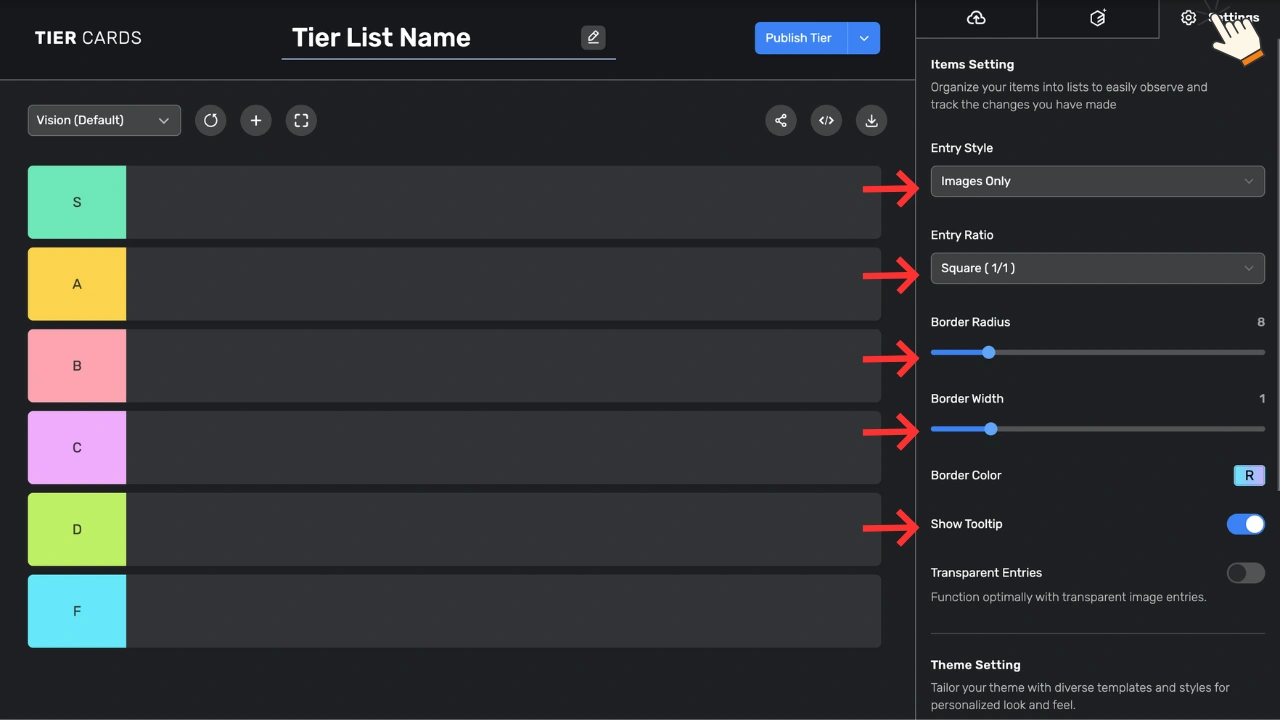
Step 4: Adjust Tier List Settings
Next, go to the Settings Tab in the editor. Here you can:
- Make uploaded image backgrounds transparent.
- Change the aspect ratio of the tier list.
- Set border width and color around images.
- Choose fonts and theme colors.
- Adjust grid size and spacing.
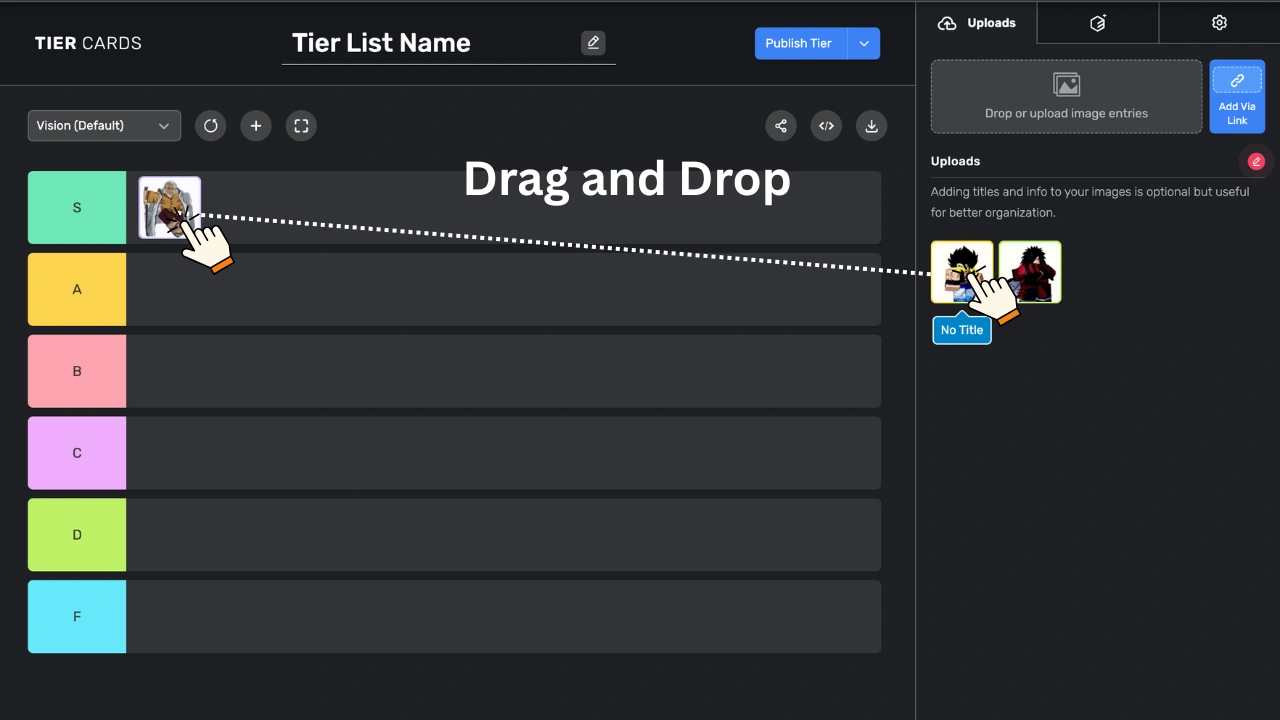
Step 5: Drag and Drop Images into Your Tier List
This step is essential — skipping it may prevent your tier list from generating properly.
- Go to the Uploads section.
- Drag each image and drop it into the appropriate tier.
- Rearrange images by dragging them within or between tiers.
Note: If images are not dragged into a tier, they won’t appear in your final tier list.
Step 6: Publish Your Tier List
- Click the “Publish Tier” button.
- Enter your tier list title and description in the popup.
- Click Publish and your tier list will go live.
You’ll receive a shareable link to post on Twitter (X), Reddit, Discord, and more!
Bonus Tips for Going Viral
- Use engaging titles like “Every Fast Food Chain Ranked from S to F!”
- Add emojis and humor to your tier labels.
- Include a short explanation or blog below your tier list.
- Use high-quality, square images.
- Invite your followers to create their own version using your template.
? Conclusion: Make Tier Lists That Get Noticed
With TierCards.com, anyone can create a powerful, visual tier list in just a few minutes. Whether you’re reviewing TV shows, ranking NBA players, or organizing your weekend tasks — tier lists are the perfect format for content, conversation, and creativity.
Follow the steps above and you’ll not only build a standout tier list but also boost your chances of going viral.
Ready to Start?